Introduction
In this guide, you will learn how to develop a WordPress plugin from scratch to create a responsive photo slider. We will cover:
- Set up a local environment with Local by Flywheel.
- The folder and file structure of the plugin.
- Explanation of each code fragment.
Benefits of Creating a Custom WordPress Plugin
Developing your own WordPress plugin offers multiple advantages, among them:
- Custom functionality: You can add exactly what you need without relying on third-party solutions.
- Performance optimization: By avoiding unnecessary plugins, you reduce the weight and loading time of your site.
- Increased security: You control the code and avoid vulnerabilities present in unknown plugins.
- Scalability: You can keep upgrading and improving your plugin as your project needs grow.
- Monetization: You can sell your plugin on marketplaces like CodeCanyon or on your own website.
Aspects to Consider
When developing a plugin, consider the following points:
- Follow WordPress best practices: Use native functions and recommended standards.
- Security: Escapes user input and validates data to prevent attacks.
- Compatibility: Test your plugin with different versions of WordPress and other popular plugins.
Your plugin will have this folder and file structure:
It’s time to get to work! With these steps, you’ll transform your ideas into a fully functional plugin. Not only will you learn how to create it, but you’ll also understand how to extend WordPress with your own solutions. Here we go!
Step 1: Configure Local by Flywheel
Download and install Local
- Go to Local by Flywheel and download the appropriate version for your operating system.
- Install and open the application.
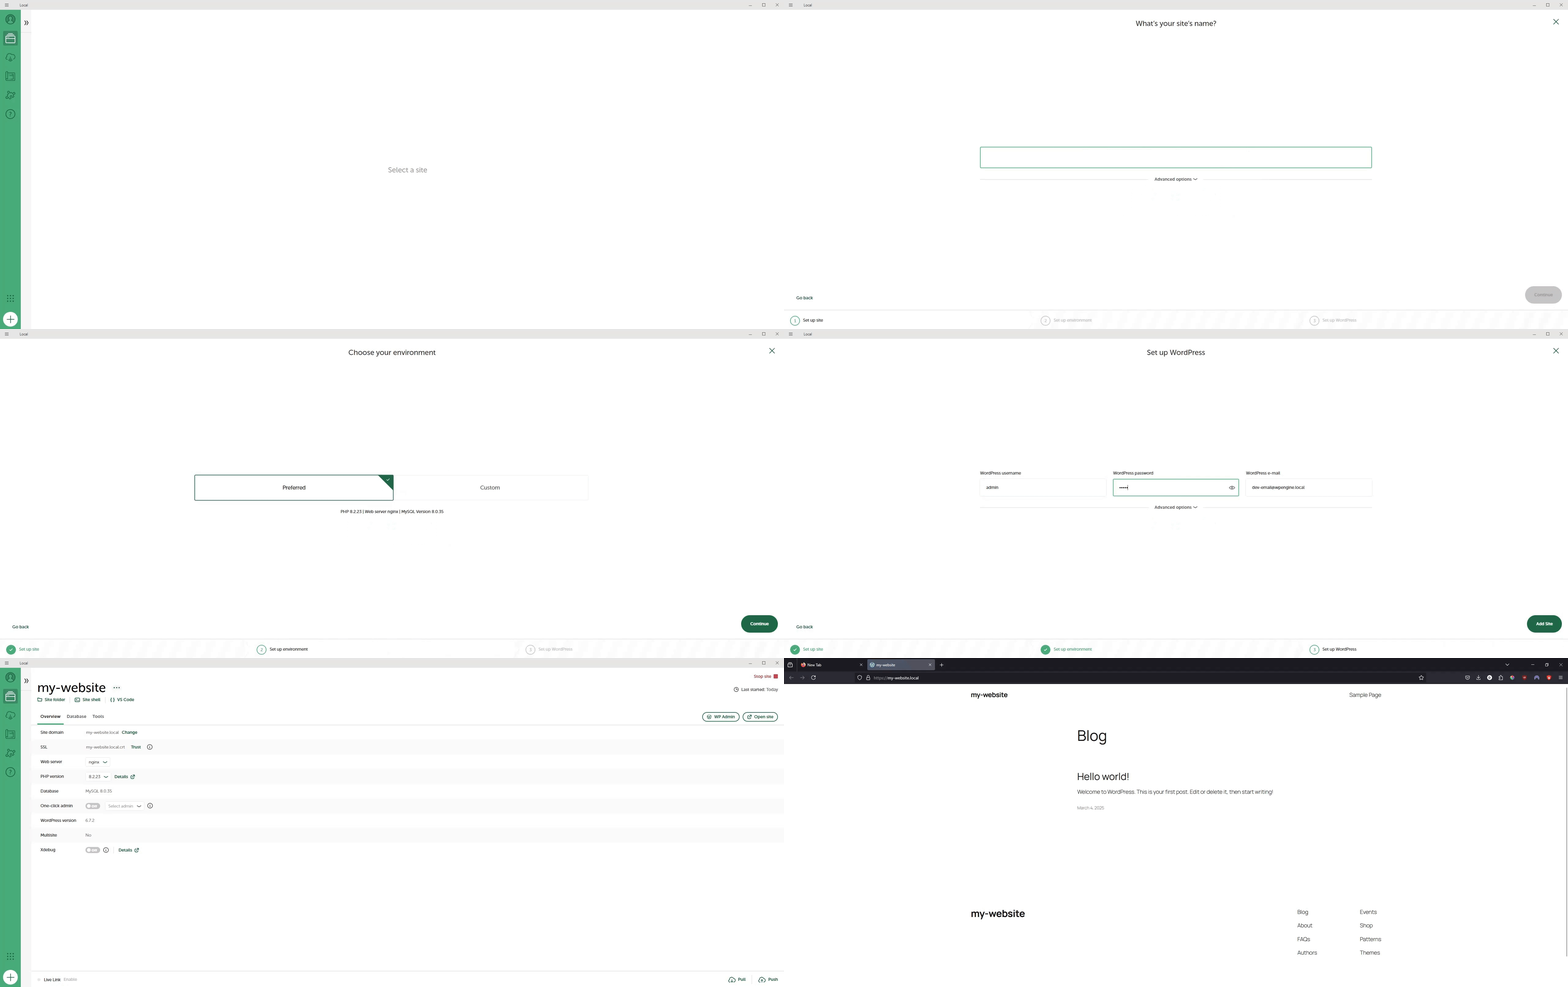
2. Create a new WordPress site
- Click on “Create a New Site”.
- Choose a name, for example, my-website.
- Select “Preferred” for a quick configuration or “Custom” to define PHP and MySQL.
- Set the administrator user and password.
- Finish and start the site.
- Login from the “WP Admin” button or open the site by clicking on the “Open Site” button and then add in the URL my-website/wp-admin to login.
Step 2: Create the Plugin Structure
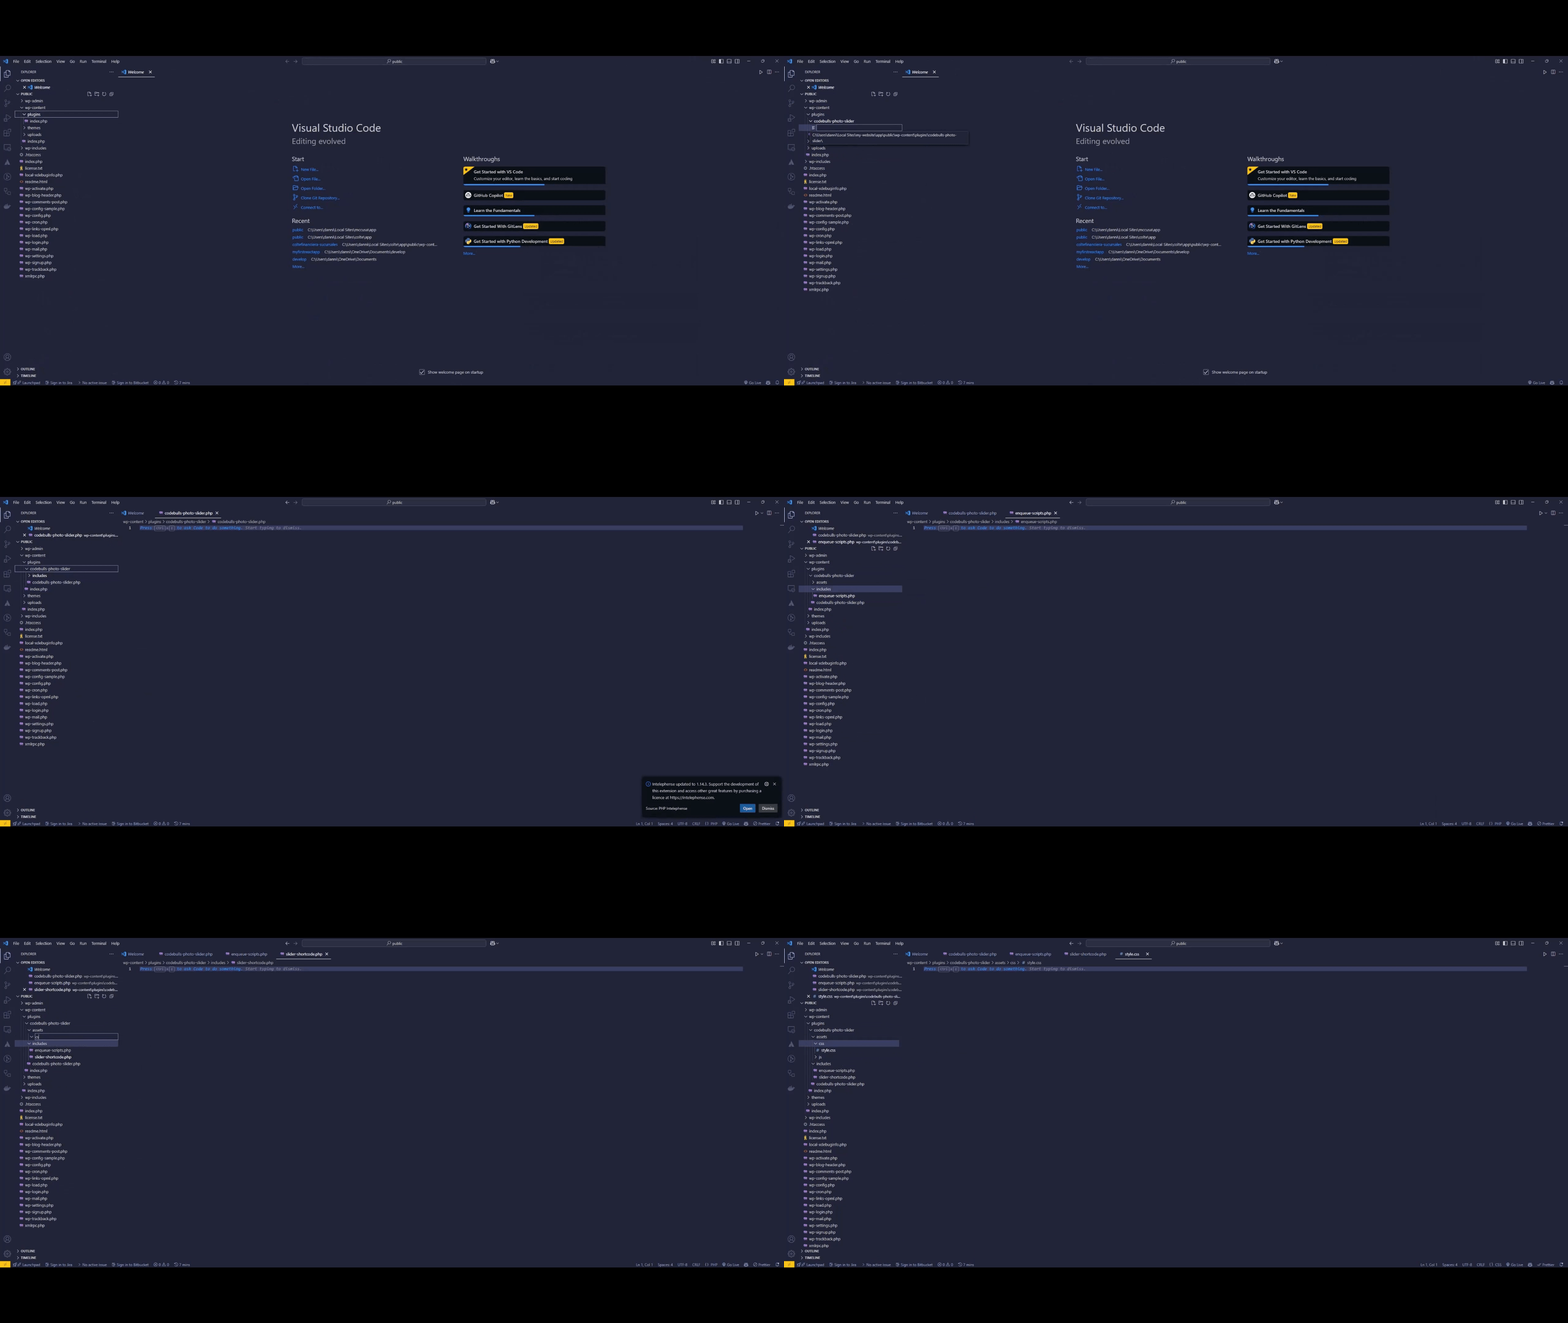
Open your project in the code editor from the “{} VS Code” button.
Inside the wp-content/plugins/ folder, create a folder called codebulls-photo-slider and inside, the following structure:
wp-content/
└── plugins/
    └── photo-slider/
        ├── photo-slider.php
        ├── includes/
        │   ├── enqueue-scripts.php
        │   └── slider-shortcode.php
        ├── assets/
            ├── css/
            │   └── style.css
            ├── js/
            │   └── slider.js
            └── images/
Step 3: Create the Plugin Master File
Create the file codebulls-photo-slider.php and add the following code:
<?php
/*
Plugin Name: Photo Slider
Plugin URI: https://example.com/
Description: Un plugin simple para crear un slider de fotos responsive usando un shortcode.
Version: 1.0
Author: Tu Nombre
Author URI: https://example.com/
License: GPLv2 or later
Text Domain: photo-slider
*/

// Evitar el acceso directo.
if ( !defined( 'ABSPATH' ) ) {
    exit;
}

// Definir constantes.
define( 'PHOTO_SLIDER_PATH', plugin_dir_path( __FILE__ ) );
define( 'PHOTO_SLIDER_URL', plugin_dir_url( __FILE__ ) );

// Incluir archivos necesarios.
require_once PHOTO_SLIDER_PATH . 'includes/enqueue-scripts.php';
require_once PHOTO_SLIDER_PATH . 'includes/slider-shortcode.php';

// Acción para registrar los scripts y estilos.
add_action( 'wp_enqueue_scripts', 'photo_slider_enqueue_scripts' );

// Registrar el shortcode del slider.
add_shortcode( 'photo_slider', 'photo_slider_shortcode' );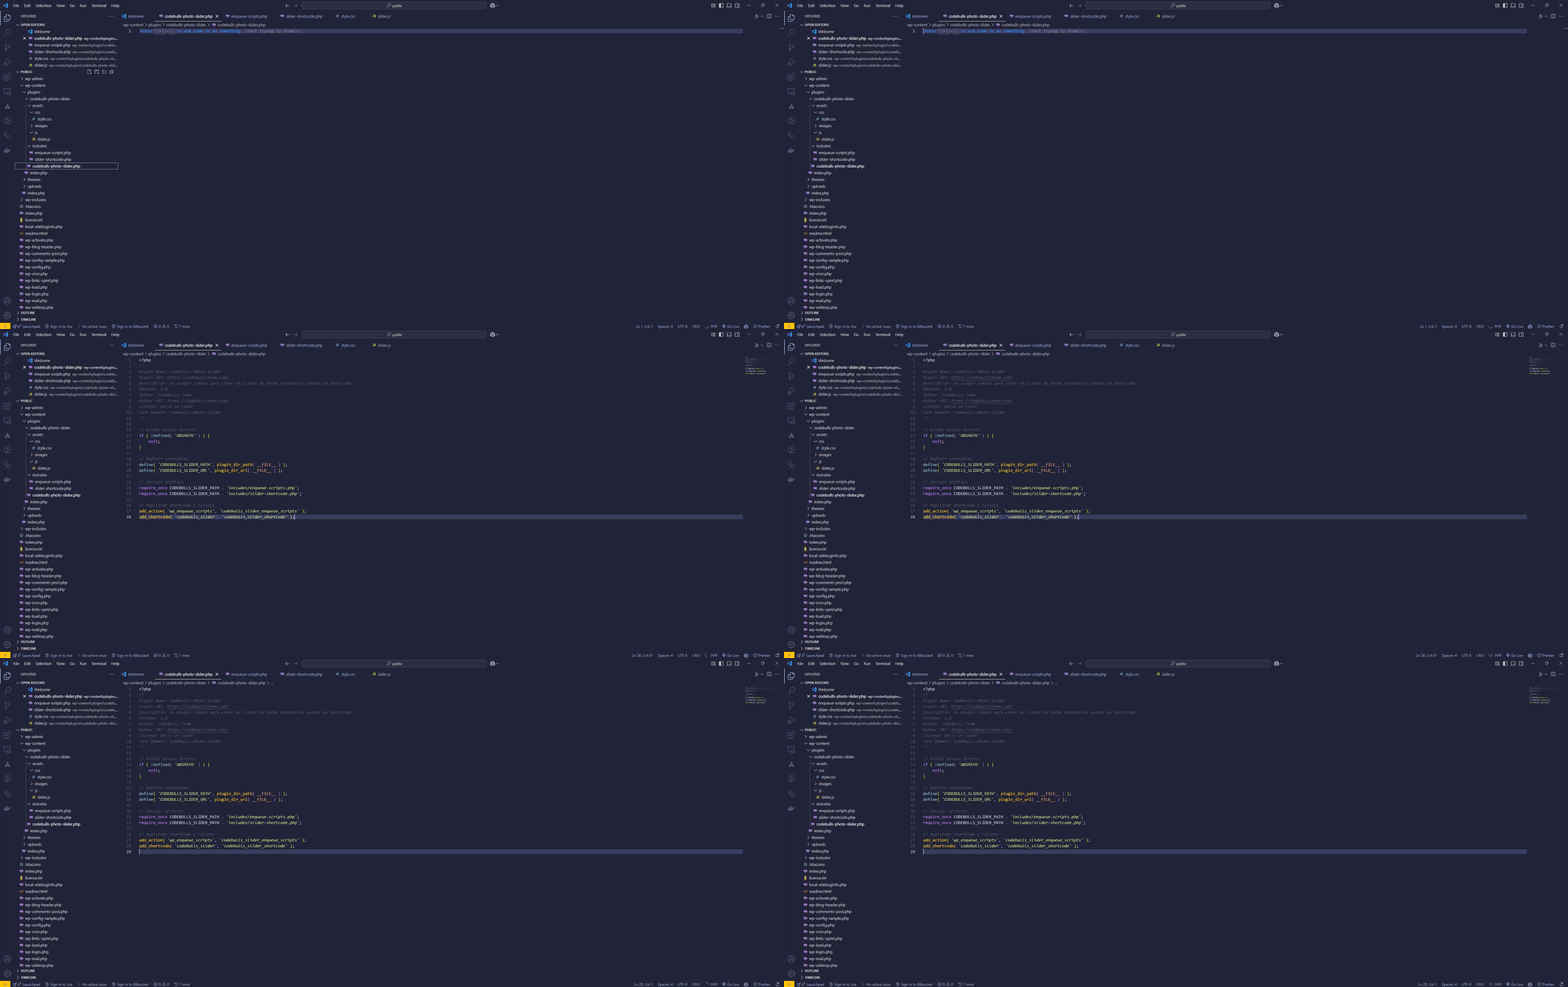
Step 4: Register Scripts and Styles
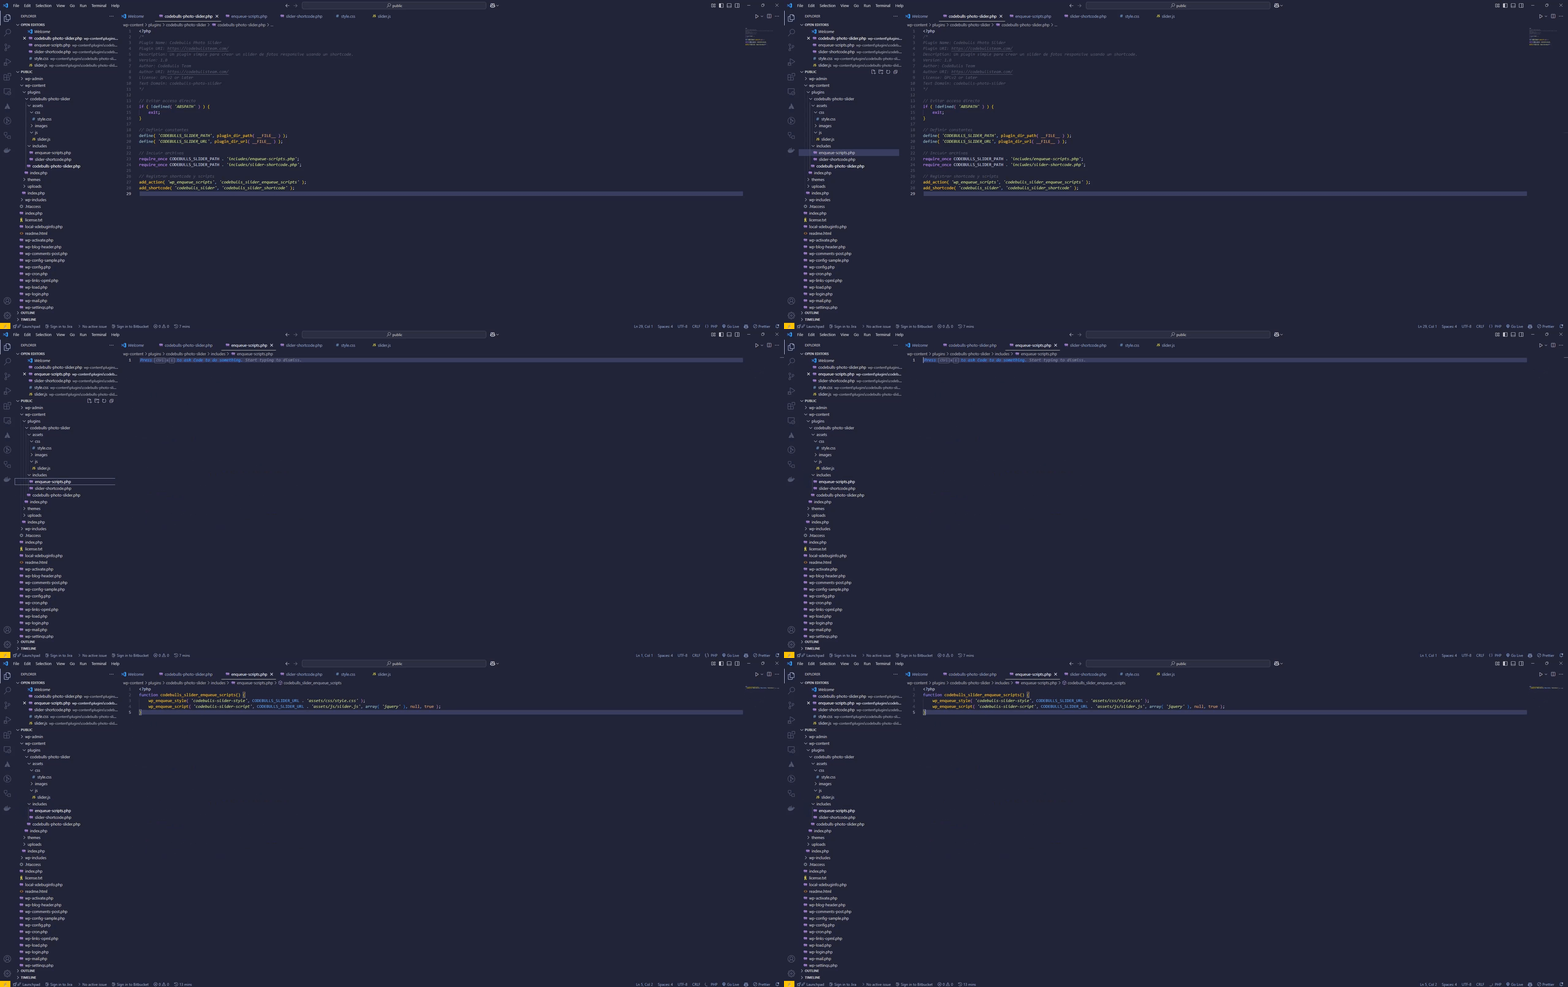
File: includes/enqueue-scripts.php
<?php

function photo_slider_enqueue_scripts() {
    // Registrar estilos
    wp_enqueue_style( 'photo-slider-style', PHOTO_SLIDER_URL . 'assets/css/style.css' );

    // Registrar scripts
    wp_enqueue_script( 'photo-slider-script', PHOTO_SLIDER_URL . 'assets/js/slider.js', array( 'jquery' ), null, true );
}
Step 5: Create Slider Shortcode
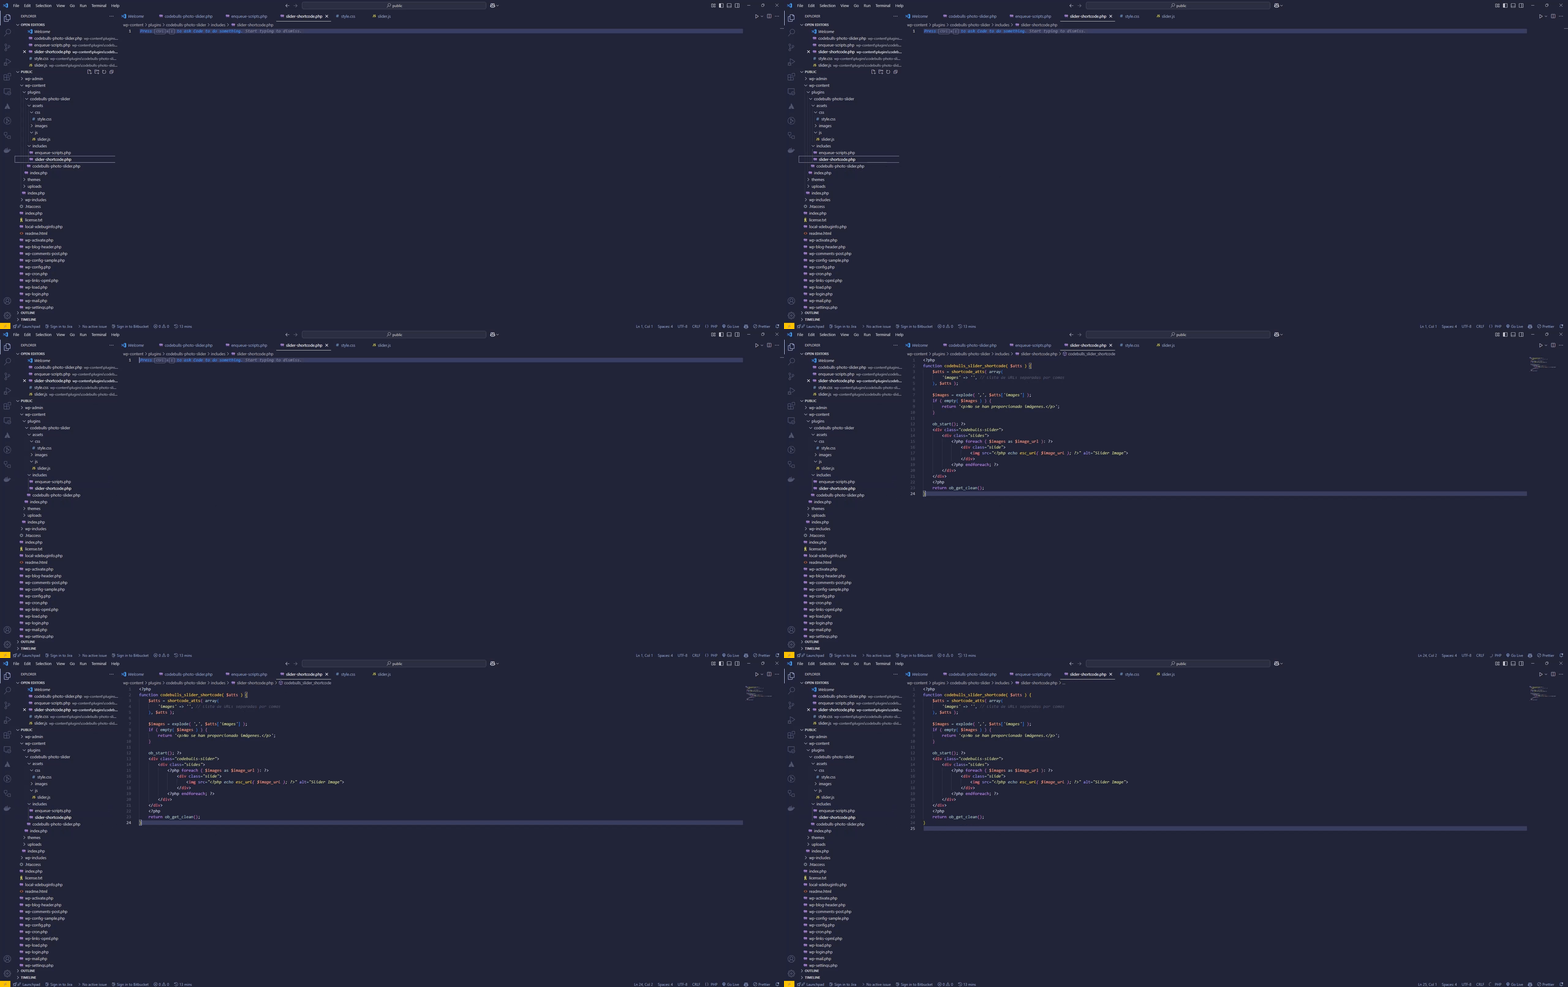
File: includes/slider-shortcode.php
<?php

function photo_slider_shortcode( $atts ) {
    // Atributos predeterminados
    $atts = shortcode_atts( array(
        'images' => '', // Lista de URLs separadas por comas
    ), $atts );

    // Obtener las imágenes
    $images = explode( ',', $atts['images'] );
    if ( empty( $images ) ) {
        return '<p>No se han proporcionado imágenes.</p>';
    }

    // Construir el slider HTML
    ob_start(); ?>
    <div class="photo-slider">
        <div class="slides">
            <?php foreach ( $images as $image_url ): ?>
                <div class="slide">
                    <img src="<?php echo esc_url( $image_url ); ?>" alt="Slider Image">
                </div>
            <?php endforeach; ?>
        </div>
    </div>
    <?php
    return ob_get_clean();
}
Step 6: Add Styles and Functionality
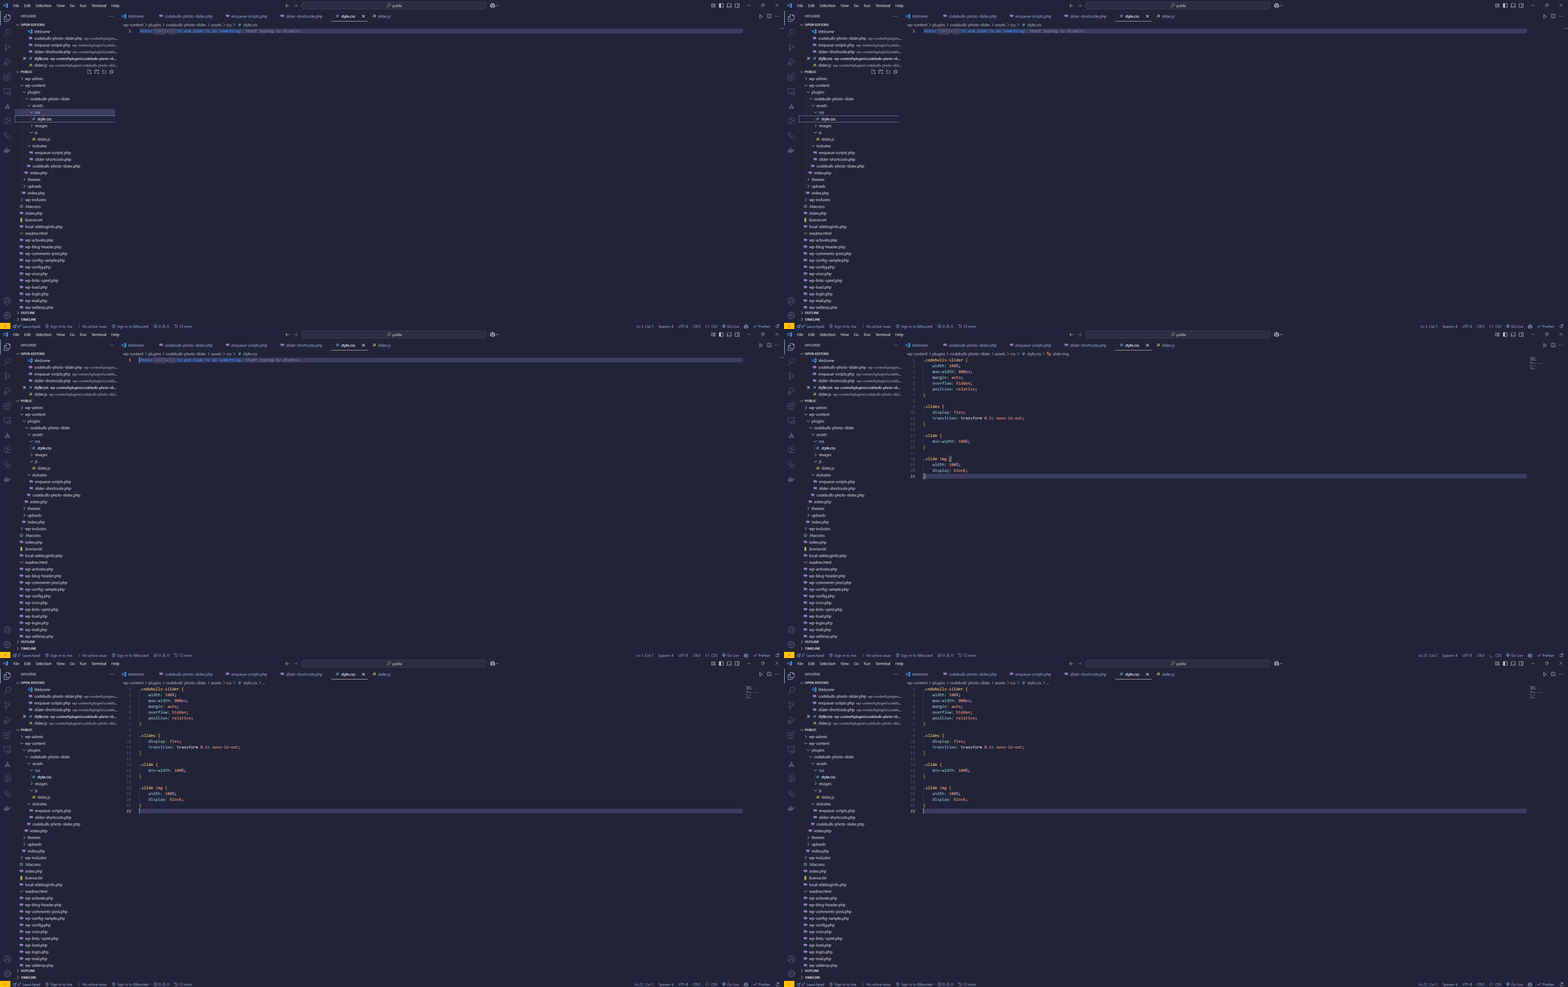
Archive: assets/css/style.css
Define basic styles to make the slider responsive.
.photo-slider {
    width: 100%;
    max-width: 800px;
    margin: auto;
    overflow: hidden;
    position: relative;
}

.slides {
    display: flex;
    transition: transform 0.5s ease-in-out;
}

.slide {
    min-width: 100%;
    box-sizing: border-box;
}

.slide img {
    width: 100%;
    display: block;
}
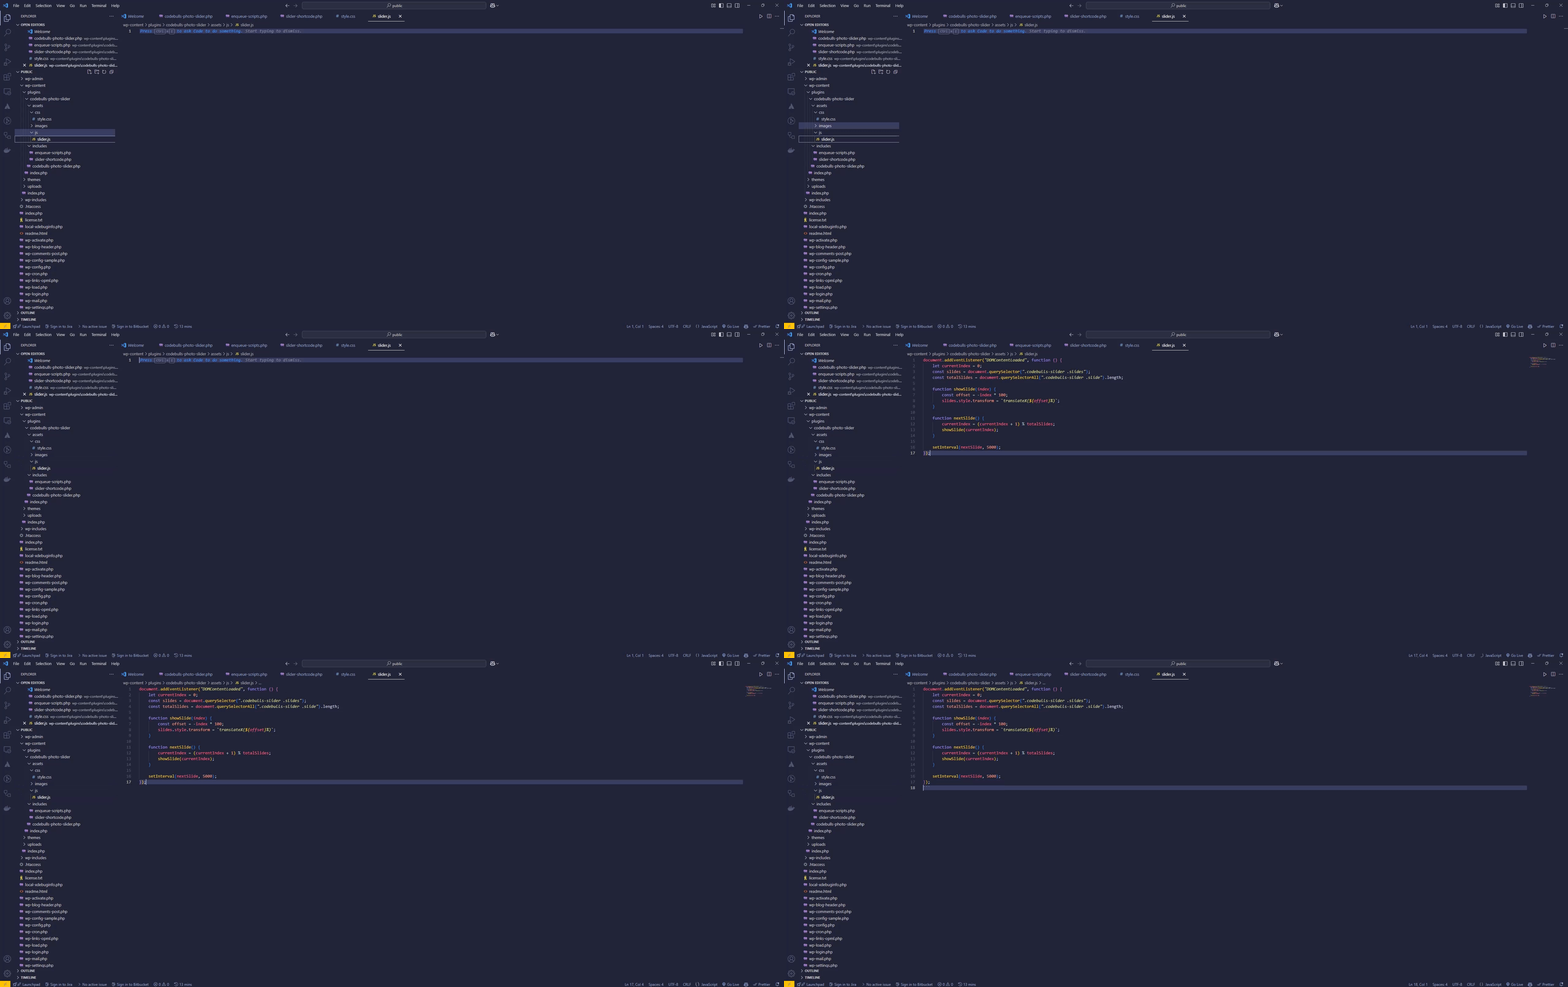
File: assets/js/slider.js
document.addEventListener("DOMContentLoaded", function () {
    const slider = document.querySelector(".codebulls-slider .slides");
    const slides = document.querySelectorAll(".codebulls-slider .slide");
    let currentIndex = 0;

    function showSlide(index) {
        if (index >= slides.length) {
            currentIndex = 0;
        } else if (index < 0) {
            currentIndex = slides.length - 1;
        } else {
            currentIndex = index;
        }

        const offset = -currentIndex * 100;
        slider.style.transform = `translateX(${offset}%)`;
    }

    function nextSlide() {
        showSlide(currentIndex + 1);
    }

    setInterval(nextSlide, 3000); // Cambia de imagen cada 3 segundos
});
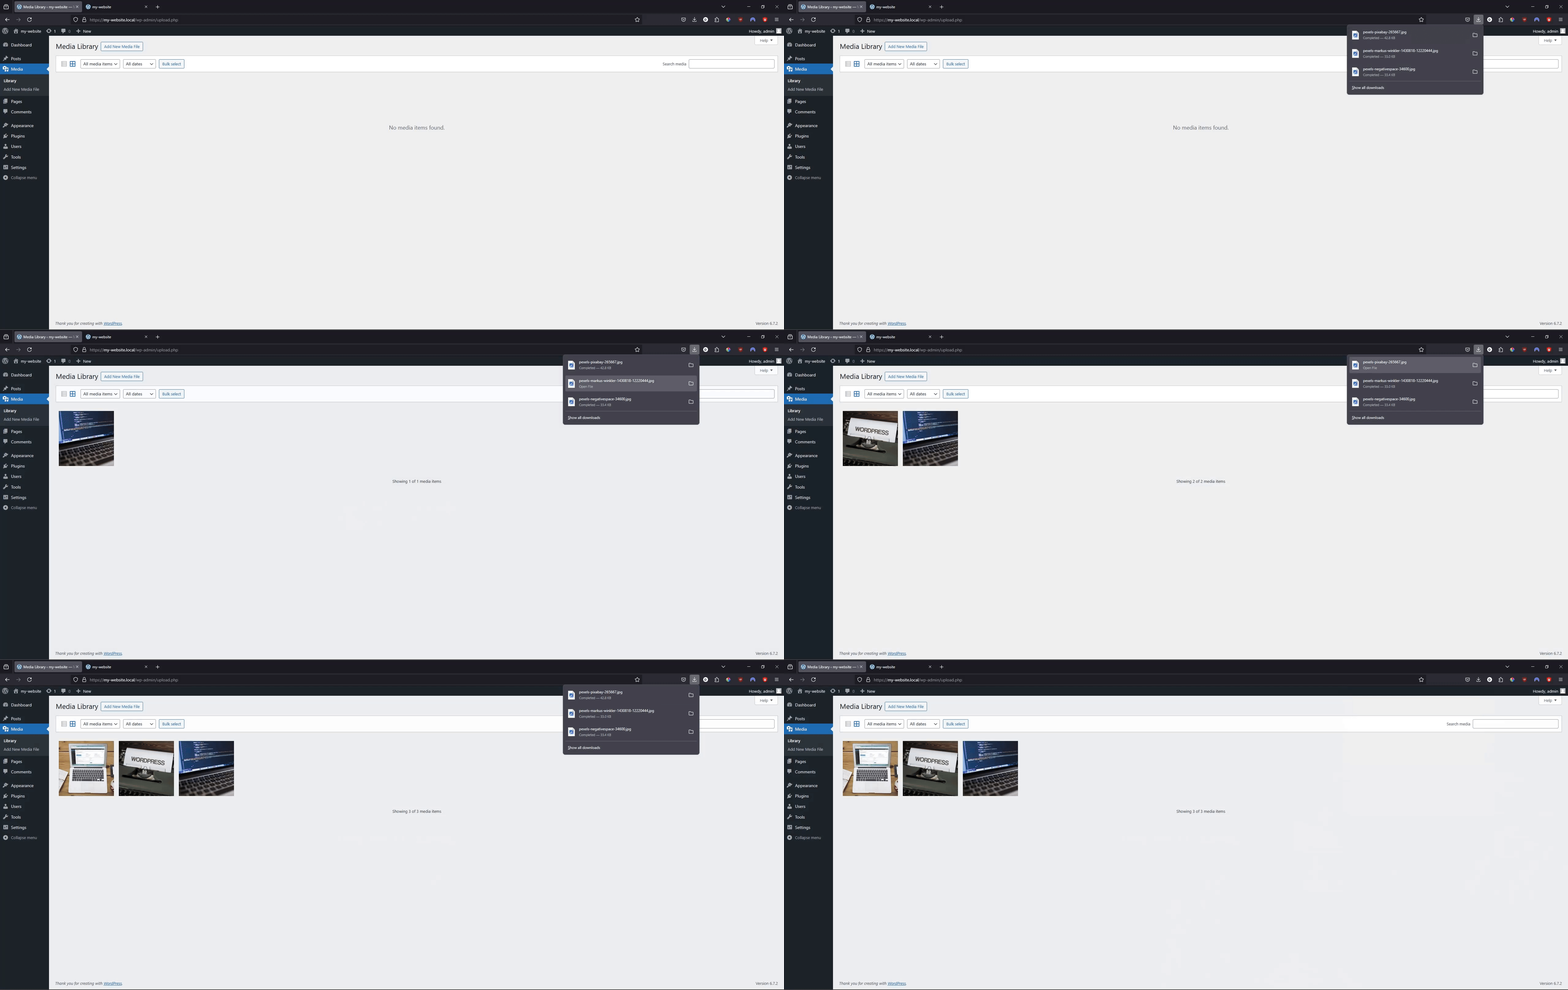
Step 7: Upload Images to the Media Library
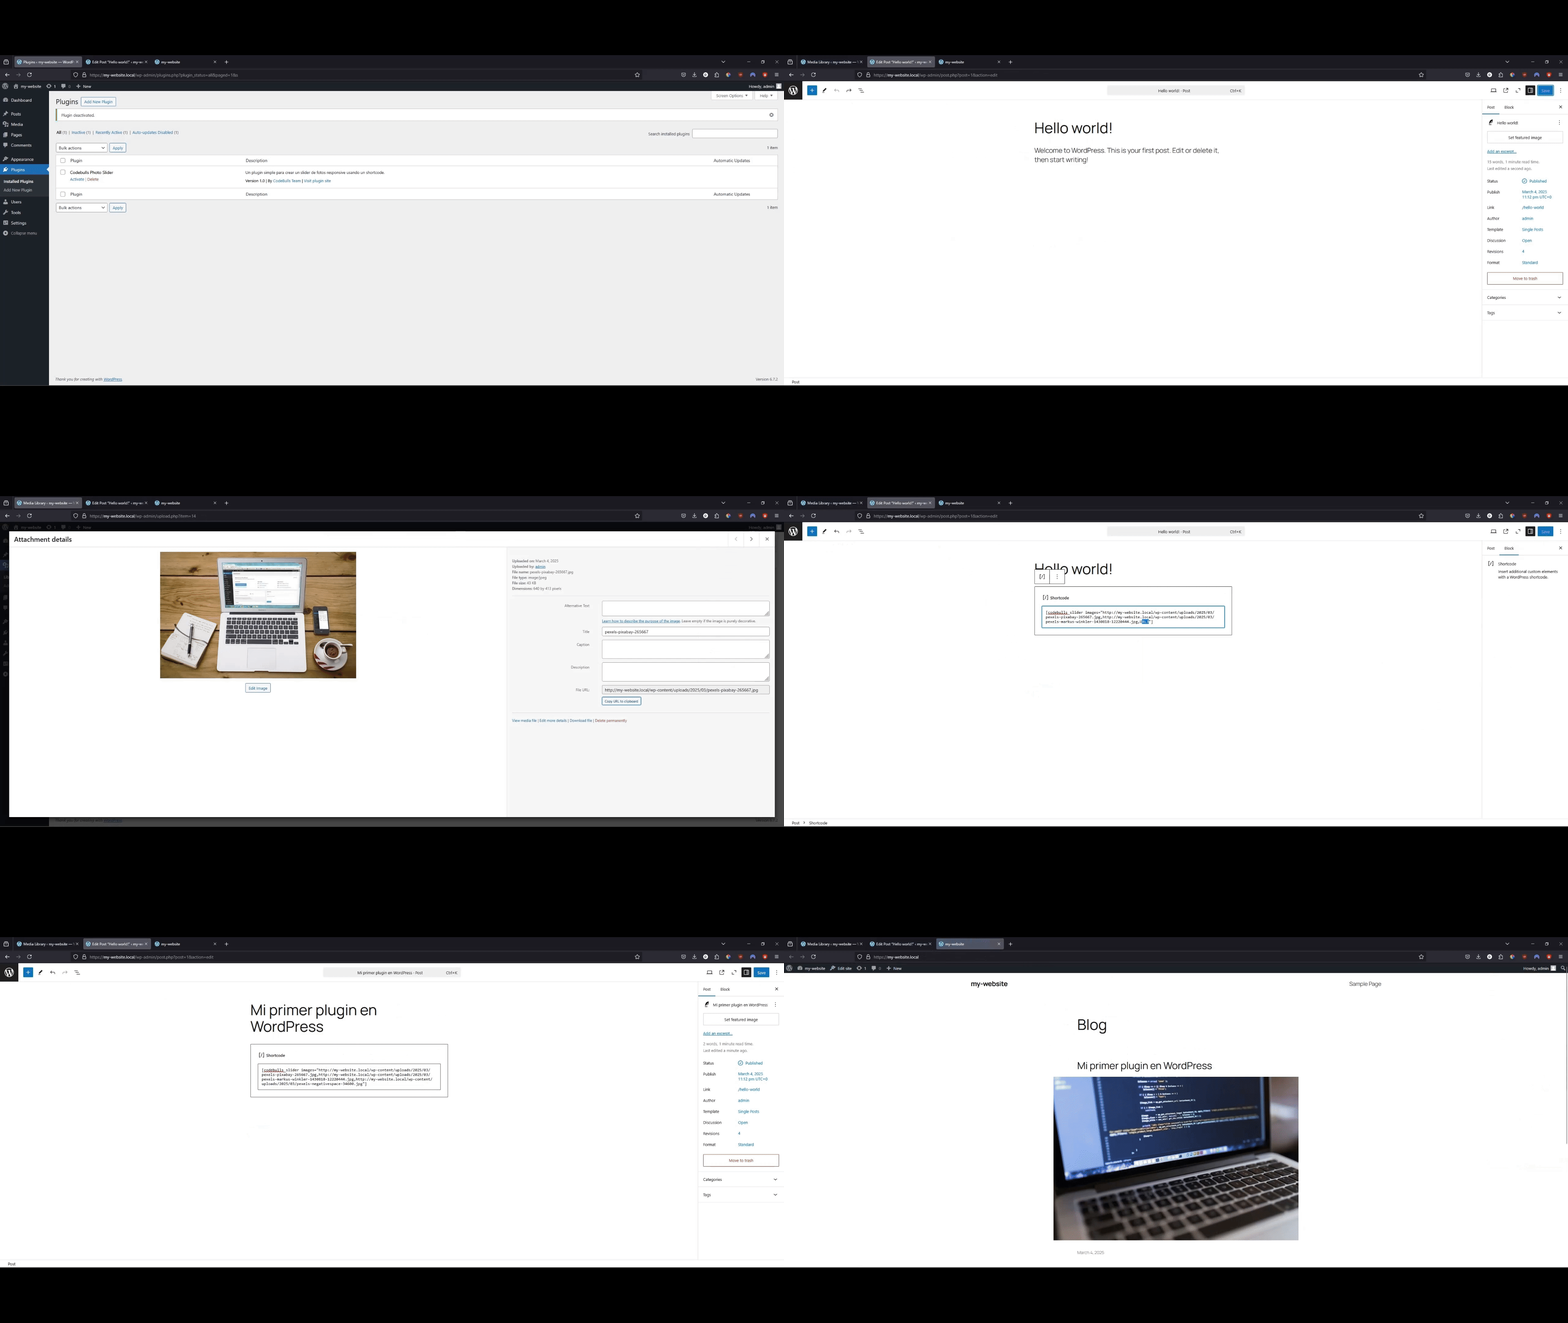
Open the Media tab in the WordPress admin panel and drag the images you want to use in the slider. Once loaded, they will be available for use.
Step 8: Activate and Test the Plugin
- Go to Plugins in the WordPress dashboard.
- Activate “Codebulls Photo Slider”.
- Create a page and paste the shortcode:
[codebulls_slider images="URL1,URL2,URL3"]Replace URL1, URL2, URL3 with the URLs of the previously loaded images.
Save and display the result.
Conclusion
Congratulations! You now have a fully functional WordPress plugin to create a responsive photo slider. Through this tutorial, you learned how to set up a local development environment, structure a plugin, register scripts, create a shortcode and manage images in the WordPress media library.
This is just the beginning: you can further customize and improve your plugin by adding customization options, advanced transitions or even integrating it with the WordPress block editor. Explore, experiment and have fun developing in WordPress.
